Science Project Kits for School Students: Learn & Experiment

Science Project Kits for School Students:- When it comes to science, the subject often involves much more than just remembering facts or formulas. Real understanding comes from seeing how things work in the real world. That’s why practical learning is so important. Reading about a concept is one thing, but doing it yourself makes it clearer, easier, and more exciting. This is where Science Project Kits come in.
Using science experiment kits helps students explore topics through hands-on activities that bring their textbook lessons to life. Whether it's a basic science project kit or a more advanced set, each one includes all the materials and tools needed to perform fun, safe, and educational experiments at home or in school. These science activity kits are not just for exams, they’re great for science fairs, exhibitions, and even quality time with family. Check out the article below for some interesting Science project ideas and Science Project Kits for School Students.
Get Exciting Discounts on Kits! Use Code AK50 at Checkout and Save more on Your Purchase Today.
Science Project Ideas for School Students
1. Static Electricity
Ingredients Required: Balloon, woollen cloth, small pieces of paper.
Steps:
-
Blow up the balloon and tie it tightly.
-
Rub the balloon vigorously with the woollen cloth for about 30 seconds.
-
Bring the balloon close to the small pieces of paper scattered on a table.
Result: The pieces of paper jump up and stick to the balloon as if they are being pulled by an invisible force.
Science Principle Involved: When the balloon is rubbed with the woollen cloth, electrons are transferred, creating static electricity. The charged balloon attracts neutral objects like paper due to the electrostatic force.
2. Open & Closed Circuit
Ingredients Required: Battery, small bulb, connecting wires, switch.
Steps:
-
Connect the battery to the bulb using the wires, keeping the switch in between.
-
Observe the bulb when the switch is turned OFF (open circuit).
-
Now turn the switch ON to close the circuit.
Result: The bulb does not glow when the circuit is open (switch OFF). It lights up when the circuit is closed (switch ON).
Science Principle Involved: Electricity flows only through a closed path. An open circuit stops the current, while a closed circuit allows current to pass, lighting up the bulb.
3. Electrical to Mechanical Energy
Ingredients Required: Small DC motor, battery, plastic fan blade or paper propeller, connecting wires, switch.
Steps:
-
Attach the fan blade to the rotating shaft of the motor.
-
Connect the motor to the battery using the wires, with a switch in the circuit.
-
Turn on the switch to complete the circuit.
Result: The fan blade starts rotating when the circuit is complete, showing movement.
Science Principle Involved: Electric energy from the battery is converted into mechanical energy by the motor, causing the fan blade to spin.
4. Conductors and Insulators
Ingredients Required: Battery, bulb, connecting wires, metal spoon, rubber band, plastic ruler, coin, pencil.
Steps:
-
Set up a basic circuit with a bulb, battery, and two loose wire ends.
-
Place different materials (like the spoon, rubber, etc.) between the loose ends to test each.
-
Observe if the bulb lights up for each material.
Result: The bulb lights up with materials like the metal spoon and coin (conductors) but remains off with rubber and plastic (insulators).
Science Principle Involved: Conductors allow the free flow of electric current, while insulators do not allow current to pass through them.
5. Conductivity of Water
Ingredients Required: Glass of distilled water, salt, two iron nails, wires, bulb, battery.
Steps:
-
Connect two iron nails to wires and dip them into the distilled water, completing a circuit with the bulb and battery.
-
Observe the bulb – it will not light up.
-
Now add salt to the water and stir well.
-
Observe the bulb again.
Result: The bulb does not glow in pure water, but after adding salt, the bulb glows faintly.
Science Principle Involved: Pure water is a poor conductor of electricity. Adding salt increases the number of ions in the water, making it conductive.
6. Electrical to Sound Energy
Ingredients Required: Buzzer or bell, battery, connecting wires, switch.
Steps:
-
Connect the buzzer to the battery using wires and insert a switch in the circuit.
-
Turn the switch ON to complete the circuit.
Result: The buzzer produces a sound when the current flows through it.
Science Principle Involved: The electrical energy from the battery is converted into sound energy in the buzzer, demonstrating energy transformation.
7. Magnetic Field
Ingredients Required: Bar magnet, iron filings, white sheet of paper.
Steps:
-
Place the bar magnet on a flat surface and cover it with a white sheet of paper.
-
Gently sprinkle iron filings evenly over the paper.
-
Lightly tap the paper and observe the pattern.
Result: Iron filings arrange themselves in a curved pattern around the magnet, showing the magnetic field lines.
Science Principle Involved: A magnetic field surrounds a magnet. The iron filings align themselves along the invisible field lines.
8. Attraction & Repulsion in Magnets
Ingredients Required: Two bar magnets.
Steps:
-
Hold the magnets by their ends and slowly bring their similar poles (e.g., north to north) together.
-
Then bring the opposite poles (north to south) together.
Result: Like poles repel each other, while unlike poles attract.
Science Principle Involved: Magnetic poles interact with each other through attractive and repulsive forces, opposite poles attract, and like poles repel.
9. Electromagnet
Ingredients Required: Iron nail, insulated copper wire, battery, switch, paper clips.
Steps:
-
Wrap the copper wire tightly around the iron nail, leaving some wire ends free.
-
Connect the wire ends to a battery with a switch.
-
Turn the switch ON and bring the nail near paper clips.
Result: The iron nail behaves like a magnet and attracts paper clips when the current flows.
Science Principle Involved: An electric current passing through a wire creates a magnetic field. Wrapping the wire around a nail makes it an electromagnet.
10. Heating Effect of Electricity
Ingredients Required: Nichrome wire (or steel wool), battery, switch, matchstick.
Steps:
-
Connect the nichrome wire in a circuit with the battery and switch.
-
Close the circuit by turning the switch ON.
-
Carefully touch a matchstick to the wire after a few seconds.
Result: The wire becomes hot and can ignite the matchstick.
Science Principle Involved: When current flows through a resistive wire like nichrome, it produces heat, this is the heating effect of electric current.
For more such amazing science experiments, check out the Science experiment kits
Science Project Kits for School Students
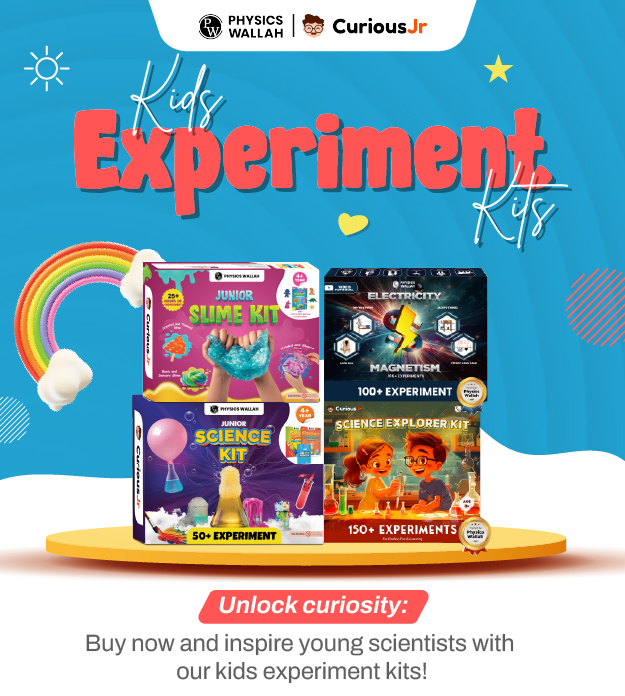
PW’s Science Project Kits are a fun and engaging way for school students to learn through hands-on activities. These science experiment kits are designed to align with the school curriculum, making them ideal for practical learning at home as well as in the classroom. Each kit includes the materials and tools needed to perform exciting experiments, helping students understand scientific concepts more effectively and develop a deeper interest in learning.
Students can explore creativity with the Slime Kit for Girls, learn important scientific concepts using the Electricity & Magnetism Experiment Kit 2025, or improve their geographical understanding with the Kids World Map Kit . Whether used for science fairs, school projects, or home learning, these kits make education interactive, enjoyable, and screen-free while encouraging curiosity and critical thinking.
Benefits of Using Science Experiment Kits
-
Hands-On Learning: Science Project Kits help children understand science better by doing real activities. They turn theory into practice, which makes learning fun and easy to remember.
-
Aligned with School Curriculum: These science experiment kits follow the syllabus, making them perfect for school use, homework support, and practical exam preparation.
-
Boosts Curiosity and Creativity: Science experiment toys spark curiosity in young minds. Kids enjoy exploring how things work, which builds a love for science from an early age.
-
Perfect for Science Fairs and Exhibitions: Whether it’s a basic science project kit or a more advanced one, these kits are ideal for creating models and experiments for school fairs and competitions.
-
Screen-Free Learning: Science activity kits offer a break from screens. Children can stay engaged while learning through real-world experiences.
-
Safe and Easy to Use: All experiment kits come with tested, child-safe materials and step-by-step instructions, making them simple and worry-free to use at home or school.
-
Parent-Child Bonding: These activities also encourage family time. Parents and children can work together using science project kits, making learning enjoyable for everyone.
Read More: 15 New Science Project Ideas
Science Project Kits FAQs
1. What are Science Project Kits?
Science Project Kits are sets that include tools and materials to help students perform fun, hands-on science experiments at home or school.
2. Who can use science experiment kits?
These kits are perfect for school students, usually from Class 4 to Class 10, depending on the kit level. They match well with CBSE and other school syllabus.
3. What’s the difference between a basic science project kit and an advanced one?
A basic science project kit covers simple experiments and concepts, ideal for beginners. Advanced kits include more complex topics for older students.
4. Are science experiment toys safe for children?
Yes, all science experiment toys and kits are made with child-safe materials and are tested for safety.
5. Can these kits help in school practical exams?
Absolutely. Science activity kits are designed to match the school syllabus, making them perfect for exam preparation and lab practice.