10 Science Experiments for Classes 8–10: Step-by-Step Practical Guide

Understanding scientific theories through textbooks alone can often feel challenging for middle and secondary school students. Performing hands-on experiments bridges the gap between theoretical knowledge and practical understanding. Whether you are aiming to excel in school assessments, prepare for upcoming science fairs, or simply build strong core fundamentals, performing practical activities is essential.
This article covers CBSE STEM activities designed as science experiments for class 8 9 10. Covering chemistry reactions, fluid mechanics, optics, and electrical circuits, these activities boost critical thinking, problem-solving skills, and analytical reasoning.
Importance of Science Experiments for Class 8 9 10
Science Experiments for Class 8 9 10 help students understand concepts through practical learning. They make difficult topics easier to understand and remember by showing how science works in real life. Experiments improve problem-solving, observation, and analytical skills. They also help students prepare for practicals, projects, science exhibitions, and school exams. Overall, hands-on activities make science learning more interesting, clear, and effective.
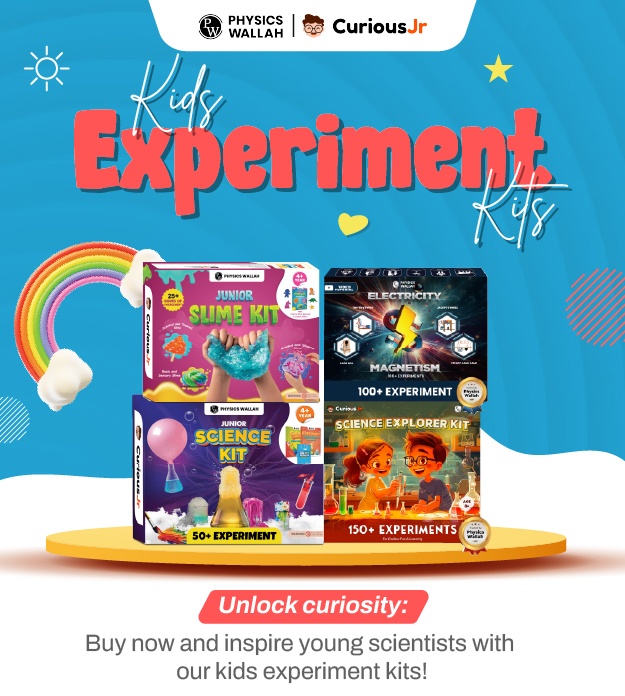
Features of Science Experiments Kit for Class 8 9 10
Make science learning fun and practical with a collection of hands-on activities and simple experiments. This kids experiment kit helps children learn science concepts through activities they can try at school or at home.
50+ STEM Activities & 22 Science Experiments: Explore more than 50 STEM activities and 22 science experiments covering Chemistry, Physics, Environmental Science, Electronics, and other STEM concepts.
Hands-On STEM Learning: Learn science by doing. The activities encourage children to explore real-world ideas, perform simple investigations, and understand how science works in everyday life.
Builds Scientific Thinking: Develop important skills such as observation, critical thinking, problem-solving, creativity, and analytical thinking through fun and practical activities.
Perfect for School Projects & Science Fairs: Use the activities for Science Exhibitions, STEM Projects, Classroom Activities, school assignments, and learning at home.
Safe & Easy-to-Perform Experiments: The experiments are designed to be simple and beginner-friendly, with guided activities that make learning easy, engaging, and enjoyable for children.
Educational Gift for Curious Minds: A useful Science Kit for Kids, STEM Learning Kit, Educational Toy, and Activity Kit for children who enjoy exploring, creating, and learning about science.
Learn Science Through Discovery: No laboratory is required. Children only need curiosity and creativity to explore the world of science through simple, hands-on activities and experiments.
What are the 10 Science Experiments for Class 8 9 10?
Chemical reactions form the backbone of physical science education in secondary school. Observing colour transformations, gas evolution, and oxidation states firsthand makes theoretical chemical equations easy to remember and apply during examinations.
Experiment 1: Displacement Reaction and Redox Magic
Displacement reactions illustrate how a more reactive metal displaces a less reactive metal from its salt solution. This fundamental exercise provides an ideal entry point when exploring science experiments for class 8 students learning about the reactivity series.
-
Objective: Observe single displacement and redox processes using metal strips and copper sulphate solution.
-
Materials Required: Copper sulphate crystals, clean iron nails or zinc strips, beaker, test tube, and distilled water.
-
Procedure:
-
Dissolve 5 g of copper sulphate in 50 ml of water inside a test tube to create a deep blue solution.
-
Submerge a clean, rust-free iron nail into the solution.
-
Leave the apparatus undisturbed for 20 minutes.
-
Observe the change in liquid colour from blue to light green and the reddish-brown deposit on the iron nail.
-
Scientific Principle: Iron is higher on the reactivity series than copper. It displaces copper from copper sulphate solution, forming ferrous sulphate (green) while elemental copper coats the nail.
|
Initial State |
Final State |
Inferred Chemical Change |
|
Deep Blue Solution |
Pale Light Green Solution |
Formation of Ferrous Sulphate |
|
Silver-Grey Iron Nail |
Reddish-Brown Coated Nail |
Displacement and Deposition of Copper |
Experiment 2: Acid-Base Colour Switch with Natural Indicators
Understanding pH levels and chemical neutralization becomes far clearer when students observe immediate colour shifts. This activity is frequently featured among science experiments for class 9 practical lessons.
-
Objective: Test household acids and bases using a custom-made red cabbage or turmeric indicator.
-
Materials Required: Red cabbage leaves or turmeric powder, warm water, clear cups, lemon juice, vinegar, baking soda solution, and soap liquid.
-
Procedure:
-
Extract indicator liquid by boiling red cabbage leaves in water for 10 minutes, then filter out the liquid.
-
Pour equal amounts of the purple indicator extract into four separate transparent cups.
-
Add lemon juice to the first cup, vinegar to the second, baking soda solution to the third, and soap solution to the fourth.
-
Note the distinct colour shifts in each container.
-
Scientific Principle: Anthocyanin molecules in red cabbage change structure based on hydrogen ion concentration. Acids turn the solution bright pink or red, neutral liquids keep it purple, and bases turn it green or yellow.
Experiment 3: Investigating the Rate of Rusting
Iron corrosion affects real-world infrastructure daily. Analyzing the exact environmental factors that accelerate iron oxidation provides valuable insights into material science.
-
Objective: Determine how air, pure water, and salt water affect the rate of iron rusting over time.
-
Materials Required: Three clean iron nails, three test tubes, boiled water, tap water, salt, and vegetable oil.
-
Procedure:
-
Place Nail A in Test Tube 1 filled with tap water exposed to air.
-
Place Nail B in Test Tube 2 filled with boiled water topped with a layer of oil to completely seal out atmospheric oxygen.
-
Place Nail C in Test Tube 3 containing concentrated saltwater.
-
Seal all tubes and observe daily over 5 days.
-
Scientific Principle: Rusting requires both moisture and oxygen simultaneously. Salt acts as an electrolyte that speeds up electron transfer, making Nail C rust fastest, whereas Nail B remains virtually unoxidized due to oxygen isolation.
Experiment 4: Carbon Dioxide Release and DIY Fire Extinguisher
Gas generation reactions clearly demonstrate mass balance and chemical change principles taught in class 9 and 10 chemistry units.
-
Objective: Produce carbon dioxide gas through an acid-carbonate reaction and extinguish a small candle flame.
-
Materials Required: Baking soda (sodium bicarbonate), household vinegar (acetic acid), a small candle, matches, and a wide-neck bottle.
-
Procedure:
-
Safely light a small tea candle placed on a heat-resistant surface.
-
Place 2 tablespoons of baking soda inside a clean plastic bottle.
-
Pour 50 ml of vinegar into the bottle; immediate effervescence will occur as carbon dioxide bubbles form.
-
Carefully tip the bottle near the candle flame without spilling any liquid, allowing only the invisible gas to pour out over the flame.
-
Scientific Principle: Acetic acid reacts with sodium bicarbonate to yield carbon dioxide gas, water, and sodium acetate. Because carbon dioxide is denser than atmospheric air and non-flammable, it smothers the flame by depriving it of oxygen.
Experiment 5: Capillarity and Walking Water Demonstration
Capillarity explains essential biological processes, including how nutrients travel from soil through plant roots up to leaves.
-
Objective: Visualize capillary transport and liquid movement through porous fibrous materials.
-
Materials Required: Six clear glass cups, water, food colouring (red, yellow, blue), and folded paper towel strips.
-
Procedure:
-
Line up 6 cups side by side. Fill cups 1, 3, and 5 with water, adding red dye to cup 1, yellow to cup 3, and blue to cup 5. Leave cups 2, 4, and 6 empty.
-
Fold strips of paper towel to bridge each adjacent cup pair.
-
Leave the arrangement overnight and observe fluid levels and colour blending in empty cups.
-
Scientific Principle: Cohesion between water molecules combined with adhesion between water and cellulose fibers allows liquid to travel upward against gravity through tiny gaps in paper towel fibers.
Check Out: PW Jr. Electric Science Kit
Experiment 6: Atmospheric Pressure and Water Level Rise
Atmospheric pressure exerts immense force on surrounding surfaces, though it often goes unnoticed until space dynamics change.
-
Objective: Demonstrate how vacuum formation and external air pressure push liquid upward into an inverted glass.
-
Materials Required: Flat dish, small candle, water with food colouring, and a tall clear glass tube or tumbler.
-
Procedure:
-
Fix a small candle upright in the center of a flat dish filled with 2 cm of coloured water.
-
Light the candle carefully.
-
Invert the clear glass tube over the lit candle, placing the open mouth completely beneath the water line.
-
Watch the candle flame dim and extinguish while the liquid rises inside the inverted glass container.
-
Scientific Principle: Burning consumes oxygen and heats trapped air inside the glass tube. As oxygen depletes, the flame dies, causing internal air temperature and gas pressure to drop sharply. Higher atmospheric pressure outside pushes liquid into the glass to equalize pressure differentials.
Experiment 7: Observing Diffusion Rates in Liquids
Diffusion rate studies form a foundational topic when reviewing science experiments for class 10 biology and physics practical curricula.
-
Objective: Compare how thermal energy affects the speed at which solute particles disperse across a solvent medium.
-
Materials Required: Two transparent beakers, cold water, hot water, potassium permanganate crystals or food dye droplets, and a stopwatch.
-
Procedure:
-
Fill Beaker A with 100 ml of cold ice water and Beaker B with 100 mL of hot water.
-
Simultaneously drop one drop of liquid food dye into the center of each beaker without stirring.
-
Start the timer and record how long it takes for the dye to spread evenly throughout each beaker.
-
Scientific Principle: Thermal energy increases the kinetic energy of water molecules. Molecules in hot water move faster, causing dye particles to collide frequently and diffuse across the container rapidly compared to cold water.
|
Water Temperature |
Observed Dispersion Time |
Kinetic Energy Level |
|
Cold Water (5 to 10 deg C) |
Slow (3 to 5 minutes) |
Low molecular kinetic energy |
|
Hot Water (60 to 70 deg C) |
Fast (15 to 30 seconds) |
High molecular kinetic energy |
Experiment 8: Exploring Non-Newtonian Fluids with Oobleck
Most liquids maintain a constant viscosity regardless of applied stress. Non-Newtonian fluids break this rule, providing a memorable physics demonstration.
-
Objective: Prepare a shear-thickening fluid to explore variable viscosity under physical force.
-
Materials Required: Cornstarch (2 cups), water (1 cup), mixing bowl, and food dye (optional).
-
Procedure:
-
Mix cornstarch and water in a 2:1 ratio in a large bowl using your hands until thoroughly combined.
-
Slowly submerge a finger into the mixture; it behaves like a smooth liquid.
-
Rapidly punch or press the surface hard; it behaves like a solid surface.
-
Scoop up a handful and roll it briskly between palms to form a ball, then release pressure and watch it flow away as a liquid.
-
Scientific Principle: Oobleck is a suspension of starch particles in water. Slow movements allow liquid molecules to lubricate starch granules, enabling flow. Rapid pressure forces starch granules to jam together, temporarily forming a rigid solid structure.
Experiment 9: Electrolysis of Water and Electrochemistry Basics
Electrolysis demonstrates how electrical energy can break strong chemical bonds, separating water molecules into hydrogen and oxygen gases.
-
Objective: Decompose water into elemental hydrogen and oxygen gases using direct electric current.
-
Materials Required: 9V battery, two sharp pencils shaved at both ends, cardboard strip, connecting wires, water, glass beaker, and table salt.
-
Procedure:
-
Fill a glass beaker with water and add 1 teaspoon of table salt to improve electrical conductivity.
-
Push two pencils through a cardboard piece so graphite tips extend downward into the saltwater without touching each other.
-
Connect one wire from the positive 9V battery terminal to the top graphite tip of Pencil 1 (Anode).
-
Connect a second wire from the negative battery terminal to the graphite tip of Pencil 2 (Cathode).
-
Observe bubble formation at both graphite electrodes submerged in liquid.
-
Scientific Principle: Direct electric current passes through the saltwater electrolyte, driving a redox reaction. Oxygen gas forms at the positive anode, while hydrogen gas collects at twice the volume at the negative cathode.
Experiment 10: Building Series and Parallel LED Circuits
Understanding circuit arrangements helps students solve practical physics numerical questions and master home wiring safety concepts.
-
Objective: Construct series and parallel circuits to observe voltage distribution across loads.
-
Materials Required: Two 3V LED bulbs, battery holder with 2 AA batteries, rocker switch, copper wire leads, and wire strippers.
-
Procedure:
-
Wire two LEDs end-to-end in a single loop connected to the battery holder (Series Circuit). Close the switch and note the LED brightness.
-
Disconnect LED 1 while keeping the circuit closed; note that LED 2 turns off immediately.
-
Reconfigure the circuit so each LED has an independent connection branch across the battery terminals (Parallel Circuit). Close the switch and observe brightness.
-
Unscrew LED 1; observe that LED 2 remains lit at full brightness.
-
Scientific Principle: In series circuits, voltage splits across components and current follows a single pathway. Interrupting one component breaks the loop. In parallel circuits, every load receives full source voltage across its separate branch, ensuring independent bulb operation.
Read More: 21 Educational STEM Projects
Science Experiments Kit FAQs
Why are hands-on STEM activities essential for middle and high school students?
Performing physical experiments bridges theoretical textbook formulas with real-world observations. Practical activities strengthen analytical thinking, improve long-term memory retention for board exams, and build foundational problem-solving skills necessary for competitive entrance examinations.
How can students safely perform chemistry experiments at home without laboratory equipment?
Students should use household-safe reagents such as vinegar, baking soda, red cabbage indicator, and salt solution. Always conduct experiments on flat surfaces, wear protective eyewear when working with liquids, and perform steps under adult supervision.
What is the primary difference between a displacement reaction and a combination reaction?
A displacement reaction occurs when a more reactive element displaces a less reactive element from its compound solution (e.g., iron displacing copper from copper sulphate). A combination reaction occurs when two or more distinct reactants combine to yield a single unified product.
How do parallel circuits differ from series circuits in domestic home applications?
In parallel circuits, each appliance operates on an independent electrical branch receiving full supply voltage. If one appliance fails or turns off, remaining devices continue functioning normally. In series circuits, all loads share a single current path, meaning one break stops the entire circuit.
What simple STEM projects are recommended for school science exhibitions?
Popular exhibition projects include building DIY fire extinguishers, creating walking water capillarity models, demonstrating water electrolysis, and assembling parallel LED lighting systems. These projects clearly display cause-and-effect science principles using simple materials.